
Are you planning to move your WordPress site to a new hosting company or a different server? The biggest risks when switching web hosting or migrating a website to a new server are data loss and downtime.
Both of these can make your website temporarily inaccessible to users and search engines resulting in loss of sales and search engine rankings(SEO).
In this step-by-step tutorial, we will show you how to safely move your WordPress site to a new host without any downtime.
We’ll also answer some of the most frequently asked questions about moving a WordPress site to a new hosting provider, so you can avoid making some common mistakes.

Important: Before we begin, we want you to know that many WordPress hosting companies offer free migration services. It might not be listed on their website, so that’s all you have to ask. It’s usually free, but some may charge a small fee for it.
Migrate WordPress Sites Using a Plugin
Having said that, let’s take a look at the steps we’ll cover to move WordPress to a new hosting server (with no downtime).
Step 1: Choose your new WordPress host
If you are still stuck with a slow web host after optimizing WordPress speed and performance, it is time to move your WordPress site to a new host that can handle your increasing traffic.
When looking for a new WordPress hosting provider, it’s important to choose carefully, so you don’t need to move again any time soon.
Here’s what we recommend:
- For reliable shared hosting, we recommend going with Bluehost. They are officially recommended by WordPress.org. Using our Bluehost coupon, Super310 users get 60% off and a free domain name.
- If you are looking for cloud hosting or location-specific providers, we recommend that you check out Cloudways. They have data centers in 3 different continents. Using our Cloudways coupon, Super310 users get 30% off.
Importance Point:
- Do not install WordPress after purchasing your new hosting. We will do this in a later step.
- For now, your new web hosting account should be completely empty and there should be no files or folders in your main directory.
Step 2: Setup All in One Plugin for Easy Migration
When migrating a WordPress site, the two main ways to do it are to use a plugin, or to do it manually. Let’s start with the easy part, how to do it with a plugin.
In this guide we’ll take a look at the other leading free migration plugin, All-in-One WP Migration.

So obviously, the first step is to add new plugins, search for: ‘All-in-One WP Migration‘, and install the plugin, then activate it.
Note: Install the plugin on both the site you want to migrate from and the host you want to migrate to.
This means you need to install WordPress on the new webhost if you haven’t already. You can do this even if you haven’t switched nameservers for most hosts yet. Log into whatever dashboard they have, usually cPanel, go to Softaculous, and install WordPress.
(If you don’t know how to access Control Panel, you can usually log in to your hosting account, select your service, and then click “Dashboard” or “Control Panel.” )
Now that you have the plugin installed on both the websites you want to export to, go to All-in-One WP Migration in the WP Dashboard and select Export.
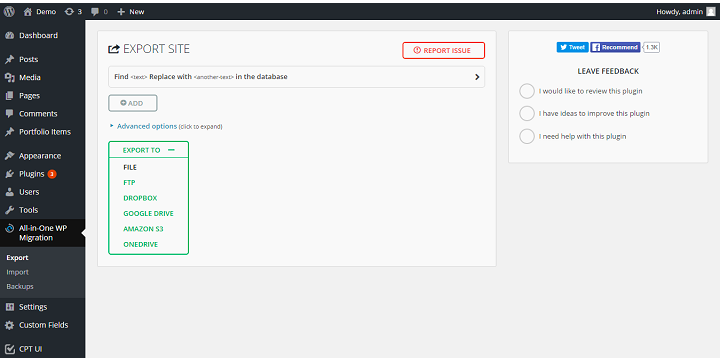
After the file is complete, download it.
After you have downloaded the file (the file name should be something like domain.com.wordpress), go to your WordPress installation on your new host.
Login to admin, go to All-in-One WP Migration > Import. Then just import the file.
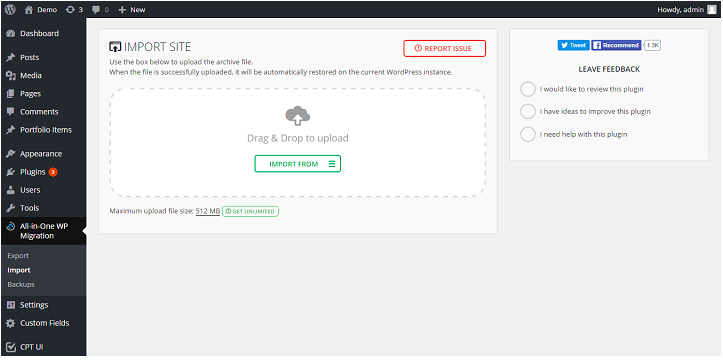
Keep in mind that there is a 512MB size limit for the free version of the plugin, and there is an increased risk of errors for really large sites, even if you get the premium version so you can have unlimited sizes, so if you have a lot Large site, you’ll probably want to migrate your site manually.
If you’re changing hosts, and you import your site using a plugin before changing the nameservers, you may have some broken links after you change the nameservers, so alternatively, you can start with the next step first. However, you will face some downtime, or if you are facing any issues, you can re-import the site once the domain change goes live.
Step 3: Change the nameservers for your domain (if you are changing hosts)
If you’re changing your host, you’ll need to change the nameservers for your DNS provider (the company you pay for your domain name). If your DNS provider is Namecheap, for example, login to the members area. After that go to the domain list.

Now click the Manage button next to the appropriate domain name, then scroll down until you see the Nameservers section. You can now change the name server to the appropriate server for your new host. When you’re done, click the check mark to save your changes, and you’re done.
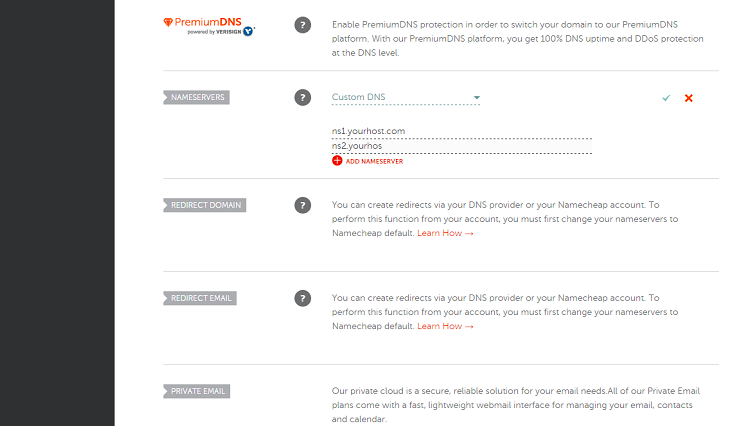
(If you don’t know the correct nameservers for your new host, you can usually find them in your welcome email after you sign up. If not, you can try Googling: ‘hosting-company name server’ , and if that fails, send a message to customer support and they should reply with them shortly.)
Note: DNS changes can take up to 48 hours, so it is recommended that you keep the site live on your old host until you confirm that the domain moves to the new host. If you do not do this, your website may see extended downtime during this period, as the domain will usually point to your old host for at least a few hours after the change.
Migrate WordPress Sites Manually
If you have a very large site, or you are a perfectionist who prefers to do things all on your own, with everything under your control, a manual migration would be the best option.
Step 1: Download Your Files
First start up by backing up your files. You can do this using an FTP client like FileZilla and save to the appropriate folder, or you can do it via cPanel Backup. (If you have installed WordPress in your root domain like most people, you should download its public_html folder to your computer.)
If your FTP connection is exceptionally slow for whatever reason, you can try simply archiving (zipping) and then downloading the same folder in the cPanel (or other Dashboard) file manager. Sometimes this can be too fast for shared hosts that have very restricted FTP connections.
Step 2: Export MySQL Database
You can do this easily with phpMyAdmin. Go into your hosting dashboard, and go to phpMyAdmin.
Once you’re there, choose the right database.
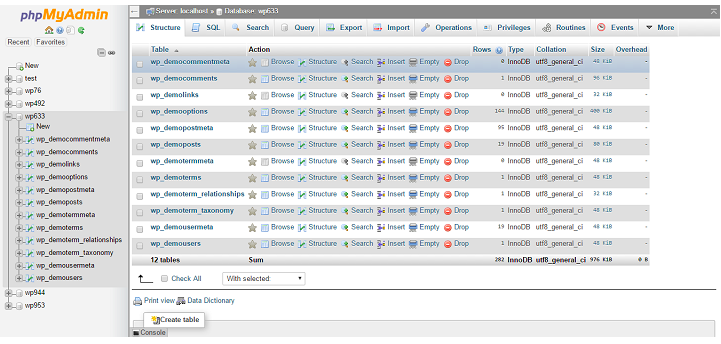
(If you have more than one WordPress site on your host, you can find the appropriate database by looking at the wp-config.php file of the site you are migrating. Inside this you can easily find the correct database by searching for DB_NAME . .)

Once you have selected the database, proceed to export and select Go. Download sql file.
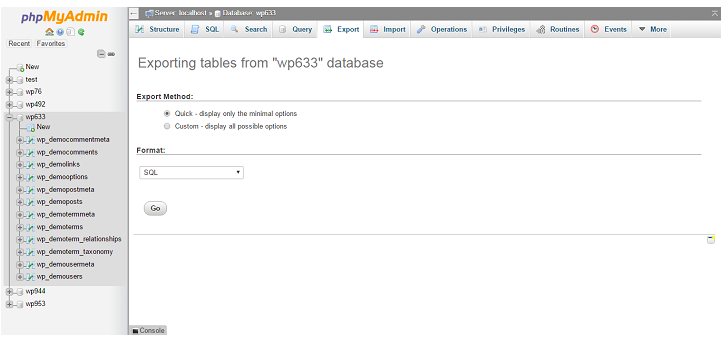
Done.
Step 3: Create a new database for your new host and import the old database
Go to the “MySQL Databases” section of your new host’s cPanel. Here you simply create a new database with the same name as your old one.
Depending on your host, your database may have a mandatory prefix. This means that even if you write to your database with the same name, the real name ends up with:
mandatory_prefix_old_wp_database_name_99
In this case, you need to rename the sql file: mandatory_prefix_old_wp_database_name_99.sql, with its old name.
Now you can go to phpMyAdmin, go to import, and import the sql file.
Then you need to open the downloaded wp-config.php file, find DB-NAME again, and change the value to the name of the new database.
Now we want to create a new user. Scroll down to “Add New User”
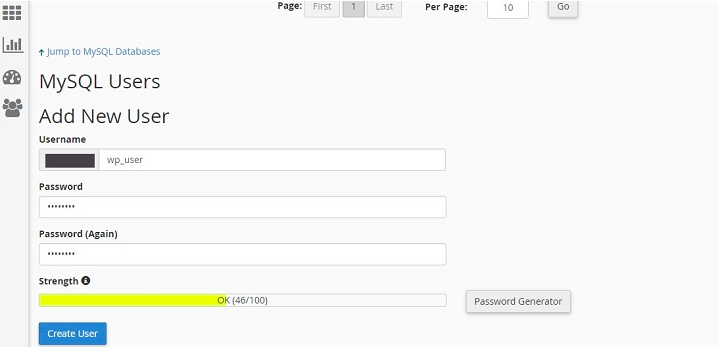
Again there may be a mandatory prefix, in which case you will need to reopen your wp-config.php file, find DB_USER and change the user. If you have also changed the password, you must also change the DB_PASSWORD.
Now go down to add user to database, select the user you have created and add them to database.
Step 4: Upload your files
Now all you have to do is upload the files you downloaded earlier to the appropriate (usually root, public_html) folder on your new host.
Now go to the temporary URL of your new host, and you should be able to see your old WordPress site running on the new host. This means that you are now ready to change the name server.
Step 5: Change Name Server
Follow the exact same steps as mentioned above under the plugin section.
If you’re changing the domain, not the host, or building a dev version of your site, you’ll need to make a few more changes…
(Not changing host, just making a local or phased development version or just changing domain?) Make some final changes:
First go to phpMyAdmin, go to wp_options, and change the values of the ‘siteurl’ and ‘home’ fields to the appropriate url.
You can use a plugin like better search and replace to find and replace all your old urls and replace with new urls suitable for your local/staging version of wordpress.
This way you can replace the url in all the places you just typed it, for example in widgets or posts (images in posts will usually break unless you use a search and replace tool).
Keep in mind:
When you’re taking a big step like migrating, especially if you’re implementing new functionality or a new design on your site, expect something to break. be ready. As mentioned earlier, back up your live site, and double-check that everything is working when your new version goes live.
Congratulations, you have now successfully migrated a WordPress site.